![]() art 1 (turret)
art 1 (turret)
First cut out part 1 in a rectangular shape, do not do the indent on the small
part of the flap yet.
Fold the flap and fold the turret sides along the 3 connecting edges.
Fold the top away from the painted side. This will be the inside of the
turret.
Trim the small part of the flap to size.
Trim the inside walls (they are just a little bit narrower than the walls).
Glue the three inside walls next to the flap to the wall.
Glue the left inside wall to the wall, but put glue only onto the half closer
to the other walls. You will stick the flap between the unglued inside and
it's respective wall.
When dry cut out the orange rectangles.
Glue the flap to the turret side. Stick it between the inside and outside
wall.
Part 2 (turret floor)
Cut the outline of part 2.
Fold the sides away from the printing.
Insert this part into the turret. It's probably best done from the bottom. The
floor should align with the bottom of the inside wall.
Part 3 (turret inlay)
Part 3 is only needed, if you feel that your turret is not stable enough.
Cut the outline, fold the flaps and insert it from the bottom of the turret.
Part 4 (turret roof)
Cut out the outline only roughly, so that the folding lines are still visible.
Fold along the lines away from the printing. Note there is only one flap, but
3 folds to give the roof it's shape and each roof segment has a roof inside
that has to be folded also.
Trim the outline.
Glue on the roof insides.
Give the roof it's shape and glue the flap to the opposite roof segment.
Glue the roof on top of the turret.
Part 5 (main wall)
Straight forward standard wall procedure.
Part 6 (main roof)
Standard roof procedure.
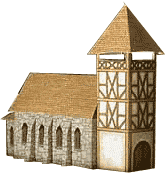
 You have now finished the basic church. You can add buttresses and/or one to three apses.
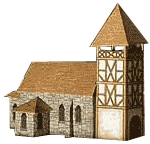
You should add at least one apse to the back wall (opposite of the turret).
One buttress between each pair of window looks very good (see picture to the left) or build the version with three apses the one at the back and one on each of the side walls plus buttresses between the windows (see picture to the right).
 Parts 7/8 (apse's wall and roof for back wall) 9/10 11/12 (apse's walls and roofs for side walls)
The walls and roofs are build as usual and glued to the respective walls, hopefully no surprises here.
Parts 13 - 18 (buttresses)
Standard buttress procedure.
And that's that.